Key Takeaways: Start with Apple’s Significant Locations, Find My, or Google Maps Timeline when checking your own iPhone. mSpy can show supported location records after an authorized setup. GEOfinder sends a location request by text, and the recipient must open the link and allow location sharing.
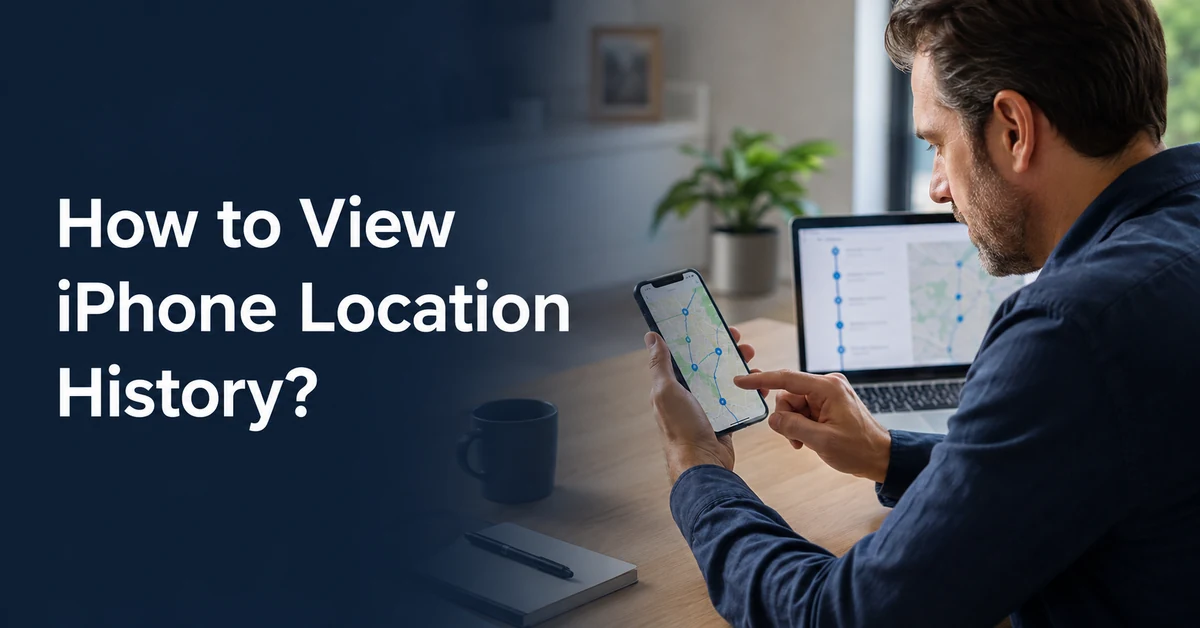
An iPhone can save several types of location information. Significant Locations remembers places you visit often. Find My can show the current or last known location of a device. Google Maps Timeline can keep a personal travel record when you turn it on.
The steps below explain each option in plain English. Menu names can differ by iOS version, country, account type, and device settings. Use location tools only on a device you own, a child’s device you may legally supervise, or with the informed consent of the adult using the phone.
Before you check iPhone location history
- Decide whether you need a saved history, a current location, or a one-time location request.
- Confirm that you have permission to view the device or account.
- Keep the Apple Account or Google Account password private.
- Do not share screenshots that expose a home, school, workplace, or daily route.
- Check renewal and refund terms before buying a paid tool.
- If a phone was stolen, contact the carrier or police instead of visiting an unfamiliar map pin alone.
Bottom Line: Use the built-in iPhone options first. They have clear account controls and can solve many location-history, sharing, and device-recovery needs.
iPhone location tools compared
| Name | What it can do | Setup | Free Trial/Refund | Visit |
|---|---|---|---|---|
 mSpy mSpy | Shows supported location records and geofences after setup | Apple account sync or an initial computer connection, depending on the method | No free trial; 14-day conditional refund | Visit |
 GEOfinder GEOfinder | Sends a link asking the recipient to share the phone’s location | No app installation; recipient approval is required | $0.99 24-hour trial; conditional refund policy | Visit |
These products solve different problems. mSpy is monitoring software for an owned or lawfully supervised device. GEOfinder is a consent-based location request. A phone number by itself cannot reveal an iPhone’s live location.
Method 1: Get an iPhone location with third-party tools
A paid service may help when the built-in options do not fit your family-safety needs. Read the setup requirements first. iPhone monitoring features can differ from Android features, and some options need Apple account access or one-time physical access.
1) mSpy
mSpy is a parental monitoring service for Android and iPhone. On a supported iPhone setup, it may show GPS records, geofences, and other synced device information. The data available depends on the setup method, device, permissions, and plan.
Its iPhone options may use Apple account sync or Wi-Fi sync. Apple account sync needs the account credentials, a verification code, iCloud backup, and the required family settings. Wi-Fi sync needs initial access to the iPhone, its passcode, a cable, and a compatible Windows PC or Mac.
How to use mSpy for location tracking
- Create an mSpy account and select an iPhone plan.
- Choose the iPhone setup method shown in your account.
- Complete the setup only on a phone you may monitor. Follow the on-screen Apple account or Wi-Fi sync instructions.
- Sign in to the mSpy web dashboard.
- Select the supervised iPhone.
- Open Locations, GPS Locations, or Geofencing, depending on the available dashboard.
- Check the last sync time before relying on a map entry.
- Remove the device from the account when monitoring is no longer needed.
Main features
- GPS location records on supported setups.
- Geofences with entry or exit alerts where available.
- Call, contact, web, app, and media records that vary by platform.
- A browser-based dashboard for the parent or device owner.
- One supervised device with a standard Premium subscription.
Pros
- Combines location tools with other parental controls.
- Supports more than one iPhone setup path.
- Longer plans have a lower monthly equivalent.
Cons
- There is no functional free trial.
- Setup requirements can be demanding.
- Feature access differs between setup methods and operating systems.
Pricing
mSpy starts at $48.99 for one month. Multi-month plans are charged in full at checkout for one supervised device.
| Plan | Total billed | Monthly equivalent |
|---|---|---|
| One month | $48.99 | $48.99 |
| Three months | $83.97 | $27.99 |
| 12 months | $139.92 | $11.66 |
Free Trial/ Refund: No free trial; 14-day conditional refund policy.
Bottom Line: mSpy may suit a parent who needs ongoing supervision on a compatible iPhone. Review the exact iPhone setup and available location features before paying.
14-day conditional refund policy.
2) GEOfinder
GEOfinder sends a location-sharing request to a phone number. The message contains a link. The recipient must open it and allow the browser to share the phone’s location.
This service does not install an app on the other phone. It also cannot locate an iPhone from its number alone. The phone must be turned on, connected to the internet, and able to receive the request.
How to send a GEOfinder location request
- Create a GEOfinder account and choose a plan or trial.
- Enter the phone number with the correct country code.
- Write a clear message that explains why you are asking for the location.
- Send the request.
- Ask the recipient to open the link and approve browser location access.
- Return to the GEOfinder account to view the shared map result.
- Cancel the trial before renewal if you do not want the paid plan.
Main features
- Works through a browser without app installation.
- Accepts phone numbers from supported countries.
- Lets you write a custom location-request message.
- Allows multiple requests under the stated plan terms.
- Shows a result only after the recipient shares the location.
Pros
- No physical installation is needed.
- The recipient controls whether to share.
- The trial gives a low-cost way to test the request flow.
Cons
- It cannot produce a result unless the recipient opens the link and gives permission.
- The trial automatically becomes a paid plan unless canceled.
- It does not provide an ongoing iPhone travel history.
Pricing
| Plan | Price | Billing note |
|---|---|---|
| 24-hour trial | $0.99 | Renews at $49.99 unless canceled |
| 28-day plan | $49.99 | Recurring billing |
| 366-day plan | $124.99 | Paid in full |
Free Trial/ Refund: $0.99 24-hour trial; conditional money-back policy.
Bottom Line: GEOfinder is useful for a one-time location request when the other person agrees to share. It does not provide hidden tracking or a past travel history.
$0.99 24-hour trial; cancel before automatic renewal.
Method 2: Check saved iPhone location history
Apple can keep a private list of places that matter to you. On some iPhones the setting is called Significant Locations. Newer software may show Significant Locations & Routes. Apple Maps may also include Visited Places.
Significant Locations data is end-to-end encrypted, so Apple says it cannot read it. The list is a device feature, not a complete log of every route or stop.
View Significant Locations or Significant Locations & Routes
- Open Settings.
- Tap Privacy & Security.
- Tap Location Services.
- Scroll down and choose System Services.
- Tap Significant Locations or Significant Locations & Routes.
- Use Face ID, Touch ID, or the iPhone passcode when asked.
- Open an available summary to review the saved places.
If the list is empty, the feature may be off, there may not be enough data, or the iPhone may have removed older entries. Apple does not promise a complete route history.
View Visited Places in Apple Maps
- Open the Maps app.
- Tap Places.
- Choose Visited Places if it appears.
- Browse by date, city, or category.
- Tap a place to see the details saved by Maps.
Visited Places is not available on every iPhone, language, or region. The setting also depends on the installed software version.
Turn off Significant Locations
- Go to Settings > Privacy & Security > Location Services.
- Scroll down and tap System Services.
- Open Significant Locations or Significant Locations & Routes.
- Authenticate when asked.
- Turn the switch off.
Delete iPhone location history
To remove Significant Locations, open the same settings page and tap Clear History. Apple says this clears significant locations from devices signed in to the same Apple Account.
For Apple Maps Visited Places, open Maps > Places > Visited Places. Delete one place from its details, or use the history controls to clear the list. If the retention menu is available, you can choose three months, one year, or forever.
Bottom Line: Significant Locations and Visited Places show selected saved places. They should not be treated as proof of every movement made by the iPhone.
Method 3: Use Find My to check an iPhone location
Find My is designed to locate an Apple device or view a location shared by a family member or friend. It shows a current or last known location when available. It does not display a full travel diary.
Turn on Find My iPhone
- Open Settings.
- Tap your name at the top.
- Tap Find My.
- Open Find My iPhone.
- Turn on Find My iPhone.
- Turn on Find My network if you want help finding the phone when it is offline.
- Turn on Send Last Location so the iPhone can send its position when the battery is very low.
Find your iPhone
- Open the Find My app on another Apple device, or sign in to Apple’s Find Devices website.
- Select Devices.
- Choose the missing iPhone.
- Review the map and the last update time.
- Use Play Sound if the phone is nearby.
- Use Directions only when it is safe to do so.
- Turn on Lost Mode if the phone is missing.
Limit or disable location access
You can change location access for individual apps under Settings > Privacy & Security > Location Services. Choose an app, then select Never, Ask Next Time Or When I Share, While Using the App, or Always when that choice is available. You can also turn Precise Location off for an app.
To stop Find My iPhone, go to Settings > your name > Find My > Find My iPhone and turn it off. You may need the Apple Account password. Disabling it reduces your ability to recover a lost or stolen phone.
Bottom Line: Find My works best when you enable it before the phone goes missing. Check the timestamp because a map pin may be an older last known location.
Method 4: Share your location on iPhone
Apple lets you share your location through Find My and Family Sharing. The person sharing keeps control and can stop at any time.
Share with a person in Find My
- Open Find My.
- Tap Me.
- Turn on Share My Location.
- Tap People.
- Tap the Add button and choose Share My Location.
- Select a contact.
- Choose to share for one hour, until the end of the day, or indefinitely.
Share through Family Sharing
- Open Settings.
- Tap Family.
- Tap Location Sharing.
- Choose the family members who can see your location.
- Ask each family member to review their own sharing choice. Joining a family group does not remove their control over location sharing.
See a location shared with you
- Open Find My.
- Tap People.
- Select the person who shared a location with you.
- Check the map and the last update time.
- Tap Directions if you need a route.
If no map appears, the request may still be waiting, sharing may have stopped, or the other phone may be offline. FamilyShielded’s guide to GPS phone tracker apps explains other family location options and their limits.
Bottom Line: Find My sharing gives both people clear controls. Use it for family coordination instead of trying to obtain another person’s location without permission.
Method 5: View Google Maps Timeline on iPhone
Google Maps Timeline can save places and routes to a signed-in device when Timeline is turned on. Current Timeline data is managed in the Google Maps app. Google says a recent Maps version is required, and availability depends on age, region, and account type.
View your Google Maps Timeline
- Update Google Maps from the App Store.
- Open Google Maps.
- Sign in to the Google Account used on the iPhone.
- Tap your profile picture.
- Tap Your Timeline.
- Choose a day, trip, place, city, or other available category.
- Check the dates and routes. Edit an entry if Google placed it incorrectly.
Turn on Google Timeline tracking
- Open Google Maps and tap your profile picture.
- Tap Your Timeline.
- Open Timeline settings or the More menu.
- Turn on Timeline for the current device when the option appears.
- Open iPhone Settings > Privacy & Security > Location Services > Google Maps.
- Choose Always if you want Maps to record trips while the app is closed.
- Open Settings > General > Background App Refresh and allow it for Google Maps.
- Return to Timeline and review the backup and auto-delete choices.
Google offers automatic deletion after three, 18, or 36 months. You can also delete one day, a date range, or all Timeline data. Timeline is stored on each signed-in device, and an encrypted backup may be available for transferring it. Deleting one device’s copy may not remove every separate copy or backup.
Bottom Line: Google Maps Timeline is useful for your own travel record when you enabled it in advance. It cannot rebuild trips that were never saved.
How to know when an app uses your location
An arrow icon can appear in the iPhone status bar when an app uses Location Services. You can review access at any time.
- Open Settings.
- Tap Privacy & Security.
- Tap Location Services.
- Review the arrow beside each app. The color and style show recent or possible location use.
- Tap an app to change its permission.
- Turn off Precise Location when an approximate area is enough.
- Open System Services to review Apple’s location-based services. If your iPhone shows a Status Bar Icon setting, use it to control the icon for system services.
Removing access can stop location features, weather updates, navigation, geofences, and device-finding functions from working as expected.
Why iPhone location history may be unavailable
- Location Services is off: Apps and system services cannot collect new location data.
- Significant Locations is off: Apple will not build that private list.
- Timeline was never enabled: Google Maps cannot show trips from before setup.
- Background App Refresh is off: Google Maps may miss movement while closed.
- The wrong account is open: Check the Apple Account or Google Account used when the data was saved.
- The device has no connection: Find My or a sharing request may show an older position.
- The history was deleted: Clearing Significant Locations or Timeline removes data that may not be recoverable.
- The app was removed or the phone was reset: Device-based Timeline data can be lost without a backup.
- The account is restricted: Age, country, school, workplace, or administrator settings can block Timeline.
- The feature is not offered: Visited Places and some menu names vary by software version and region.
Check the setting, account, permission, and last update time before assuming a record is accurate. For ongoing child-safety controls, compare current parental control apps and choose only the access you need.
Verdict
Significant Locations and Apple Maps are the best starting points for saved places on your own iPhone. Find My works for a missing device or voluntary location sharing. Google Maps Timeline gives a longer personal travel record when it was enabled before the trip.
mSpy can add authorized parental monitoring on a compatible phone, but setup and feature limits need attention. GEOfinder fits a one-time request when the recipient is ready to open a link and share a location. Neither tool creates permission to track another adult.